Showing posts with label baking. Show all posts

Tuesday, July 26, 2011

i miss my baker today

Once upon a friday night, Steve and I set out to make our more favoritest cookies in the whole wide world, we call them "backwards chocolate chip cookies"

They're cocoa cookies with white chocolate chips and a recipe I invented one day... soooo delish! But, the point of this post is that it just so happened that I was mixing up the batter and he offered to do the baking. I couldn't have been happier (albeit slightly skeptical). Since my baking abilities are rather, well, hap-hazard... I think it's because I multi-task too much! I can whip up a mean batter, but if it flops in the oven, what good is it?

But it turns out, Steve has just the right attention span to be an excellent baker. So since then, we have a system. I make the batter, he bakes it. Perfection!

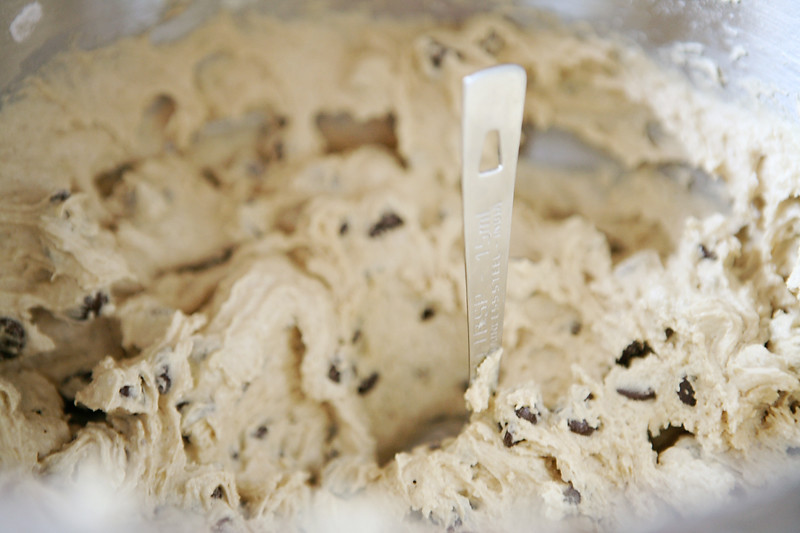
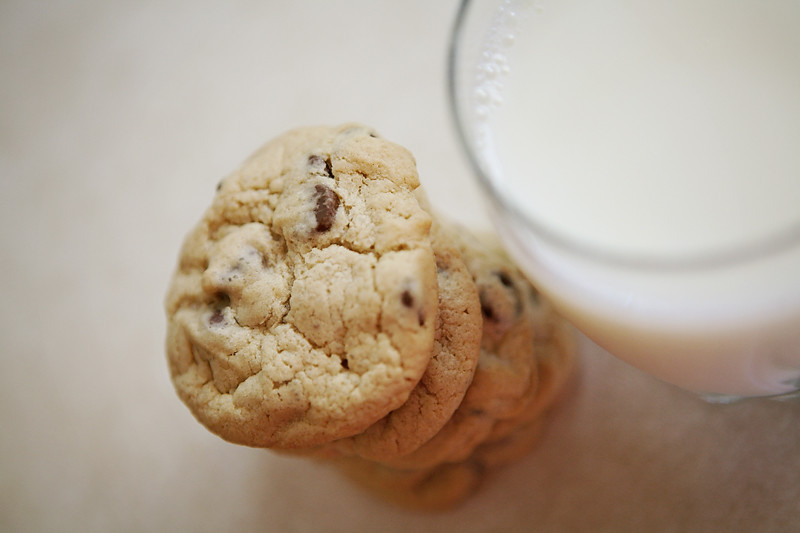
Today I wanted chocolate chip cookies though, and my baker is working studiously at his, well, job.

IMG_1624

I did ok for myself though. Maybe because I only have enough energy to do like, 3 things at a time ;)

IMG_1626

Today cookies, tomorrow the house! (cleaning it that is ;)


Photobucket

Thursday, January 20, 2011

busy

Before Christmas, I was busy. Now, after Christmas, I'm still busy. Surprise surprise!

But it's not the same kind of busy. Thankfully this current time of busy is more manageable. When I get busy I usually throw cleaning to the wind. Not because I enjoy living with messes, but simply because, you guessed it, I'm too busy to care!

Truthfully though, my life is not so crazy and hectic and busy as I make it sound, but I do manage to get through each and every hour of every day wishing I had more time!

Today I've been home alone since 8am. I told myself all day yesterday that today I would cleeeeaaannnn. But wait a second, American Idol recorded last night... I had no intention of watching it this year, but it saved my record settings from last season... and since it was there, I had to watch! Long about 10 o'clock I decided enough was enough and if I didn't start now, the whole day would be down the drain.

So I set the timer for 1 hour. And I resolved to not check my email, facebook, phone, anything for sixty minutes. And it worked! I got a ton done! It was so inspirational, I set the timer for another half hour and kept going.

And then since I had done the stuff I don't like so much, I decided to make some granola (because baking I don't consider housework or even work at all. I love to bake... and I love sending it to work with Steve for his co-workers ;) Well, the granola was a big fat flop. Really gross in my opinion. I had never made it before and I'm pretty disappointed. I did learn one thing about making granola though... the flag batch should probably not be enough to feed 10 small children for a year.

I have a lot of gross granola in my house now.

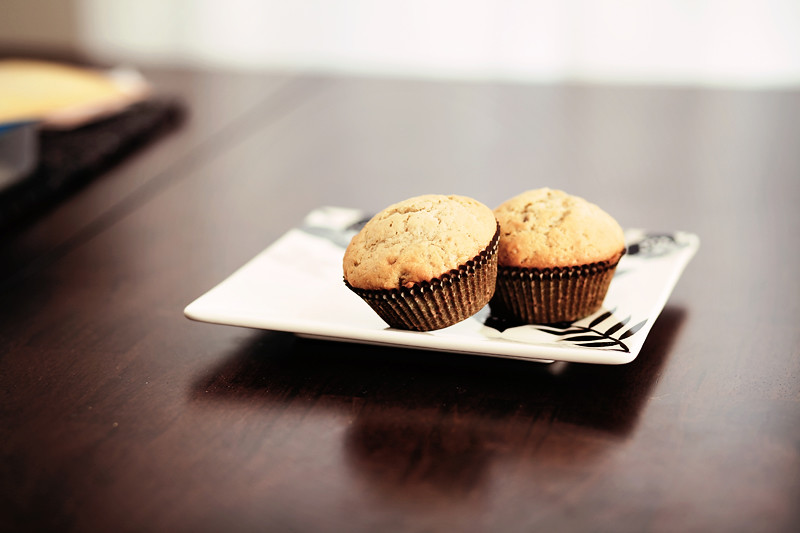
Depressing as that was I decided to make banana muffins. Which are in fact, something I make regularly. I am a banana snob. I love them, but only before they turn all the way yellow. Once they're all yellow I'm just like blech. So they get made into muffins!

IMG_8291
Oh! And I took a picture of it. See how my day just flies by when I'm so busy ;)


Photobucket

Tuesday, October 13, 2009

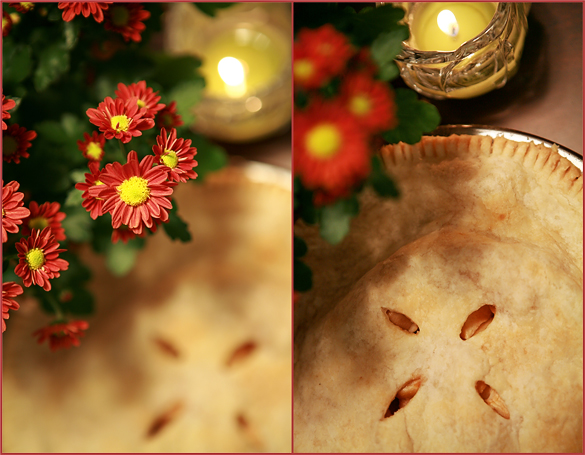
Is it time for fall?

apple pie

Oh yes, it is :)


Photobucket

Wednesday, December 24, 2008

cookie decorating on a snow day

The other day, on the kids snow day I decided that it would be fun to come to my house and make the cut-out cookies. All went well for awhile, as you can see from the below pictures... but it wasn't long before things went south.


This one's for Jim


Unfortunately, for the sake of the process, the actual decorating part went painfully slow. I decorated an entire rabbit family in the amount of time it took them to decorate one cookie. Their cookies were lovely though, but in my family, cookie decorating is serious business. It needs to get done as quickly as possible to maximize eating time potential.

Before the decorating even began though, they got ahold of my video camera and went to town. while i was going through all the footage to edit, I found some less than appropriate mooning, which I kindly cut out. however, i laughed SO HARD when I saw it! (note, if you're watching this from the actual site, you may want to scroll to the bottom and pause the music player :)


Photobucket

Sunday, April 27, 2008

The Daring Bakers Do Cheesecake Pops


A little over a month ago i found the Daring Bakers and was so completely thrilled with what they are doing decided to join in on the fun! Each month one of the DBers host and post a recipe that over 1000 members work on throughout the month and then publish all on the same day. It was a lot of fun and I am really excited to see what fun things we will have to do in the months to come! If you'd like to see what others came up with for this assignment, you can head over to the Daring Bakers Daring Bakers blogroll here.

This month was Cheesecake Pops. I had never heard of such a thing, but seeing as how I am a huge fan of cheesecake AND chocolate, how could I go wrong?!?! So I set out to complete my challenge, and it turned out great! I took them to my small group last week for everyone to enjoy and they received rave reviews... in response to my explanation of why and where the idea had come from i explained that i had joined a baking community online. in response to that I heard , "words you will never hear me say..." from our beloved and fearless leader Bob.

Anyways, I digress. I dove into the challenge super excited and I came out satisfied with my work. This is a super dessert to take to a dinner party or some sort of special event. They're not that hard to make, they're just time consuming :) The only thing i had a slight problem with was the baking time. I started checking the cake at about 35 minutes and then after an hour and then every 5 minutes or so. It rose high above the top of the pan, which since this was my first time making a cheesecake still do not know if that is normal, but when I took it out, it settled back down into the pan and ended up being fabulous.

Cheesecake Pops (Makes 30 – 40 Pops)

5 8-oz. packages cream cheese at room temperature
2 cups sugar
¼ cup all-purpose flour
¼ teaspoon salt
5 large eggs
2 egg yolks
2 teaspoons pure vanilla extract
¼ cup heavy cream

Boiling water as needed

Thirty to forty 8-inch lollipop sticks

1 pound of flavored coatings (you know those chocolate wafers that you can get at different craft stores like Michaels, Joanns, sometimes even Walmart. You may want a few different colors/flavors for variety :)

Assorted decorations such as chopped nuts, colored jimmies, crushed peppermints, mini chocolate chips, sanding sugars, dragees) - Optional


Directions:

- Position oven rack in the middle of the oven and preheat to 325 degrees F
- Grease a 10-inch cake pan (not a springform pan)
- Set some water to boil
- In a large bowl, beat together the cream cheese, sugar, flour, and salt until smooth
- If using a mixer, mix on low speed
- Add the whole eggs and the egg yolks, one at a time, beating well (but still at low speed) after each addition
- Beat in the vanilla and cream
- Pour the batter into the cake pan
- Place the pan in a larger roasting pan
- Fill the roasting pan with the boiling water until it reaches halfway up the sides of the cake pan. - Bake until the cheesecake is firm and slightly golden on top (the directions originally said 35-45 minutes, but I found that it took much longer, closer to an hour and 15 minutes)
- Remove the cheesecake from the water bath and cool to room temperature
- Cover the cheesecake with plastic wrap and refrigerate until very cold, at least 3 hours or up to overnight
- When the cheesecake is cold and very firm, scoop the cheesecake into 2-ounce balls and place on a parchment paper-lined baking sheet
- Carefully insert a lollipop stick into each cheesecake ball


- Freeze the cheesecake pops, uncovered, until very hard, AT LEAST 1-2 hours. (mine were MUCH better after 3 hours but i jumped the gun and started some of them after just an hour and a half)
- When the cheesecake pops are frozen and ready for dipping, prepare the chocolate by heating in the microwave at 30 second intervals stirring in between
- Quickly dip a frozen cheesecake pop in the melted chocolate, swirling quickly to coat it completely
Shake off any excess into the melted chocolate
- If you like, you can now roll the pops quickly in optional decorations
- You can also drizzle them with a contrasting color of melted chocolate (dark chocolate drizzled over milk chocolate or white chocolate over dark chocolate, etc)


- Place the pop on a clean parchment paper-lined baking sheet to set
- Repeat with remaining pops until done
- Refrigerate the pops for up to 24 hours, until ready to serve.

Friday, March 14, 2008

Lemon Pound Cake with Strawberry Compote

Welcome Spring! I decided today that spring is here and winter is over. I like to decide these things sometimes, and then i just move along as though it were true. For me, it is! Anyways, I wore capris today and my summer flats... let it begin!


Baking this cake really put me in the mood for spring. The lemon flavor and getting to see so many strawberries while there is still snow on the ground was a breath of spring air! And I actually have been debating whether or not i should post recipes for everything I make... but this one just is TOO GOOD NOT TO SHARE. Seriously. Ask Melissa if you don't believe me.


So here it is, in it's entirety. I must tell you though, don't bake this cake if you don't have a good amount of time on your hands. It took me the better part of yesterday and then i still had to make the whipped cream today. I had a lot of fun though, the kids helped me and then Melissa helped me with the picture taking adventure today. I'll tell ya what, for me, taking the pictures is 75% of the fun of doing this!


First off, I need to give credit where credit is due. I found this recipe on another blog and only modified it slightly.

Ingredients:

Lemon Pound Cake
2 3/4 cups all purpose flour
1/2 tsp baking powder
1/4 tsp salt
3 sticks salted butter at room temperature
1 3/4 AND 1/2 cups sugar
6 large eggs
1 cup milk
1 1/2 TB lemon zest
1 tsp pure lemon extract
1/2 cup fresh lemon juice (i cheated, i only used half fresh, cause i didn't have enough! but it tasted just fine anyways :)

Strawberry Compote
3 pints fresh strawberries, washed, patted dry and sliced
1 cup sugar
2 Tbsp lemon juice

Whipped Cream
16 oz heavy whipping cream
1/2 cup confectioners sugar


Preparation:

Cake
- Preheat oven to 300F
- Butter and flour a 12 cup Bundt pan
- Combine the flour, baking powder and salt
- Cream the butter and 1 3/4 cups sugar until pale and fluffy
- Add the eggs, one at a time, beating well after each addition
- Reduce the speed and add the flour mixture, alternating with the milk
- Stir in the lemon zest and lemon extract
- Pour the batter into the prepared pan and bake for 1 1/2 hours, or until a knife inserted in the middle comes out clean
- Let cool in the pan for 15 minutes
- Poke holes all over the cake using a wooden skewer
- Meanwhile, bring the lemon juice and remaining sugar to a boil over medium high heat in a small saucepan, stirring until the sugar is dissolved
- Invert the cake onto a rack, position over a baking sheet and slowly pour the syrup over the cake, it will seap through the holes and into the cake
- Let cool to room temp


Strawberry Compote
- In a non-reactive saucepan, over medium heat, combine 2 pints of the strawberries, sugar and lemon juice
- Bring the liquid to a boil, reduce the heat to medium and simmer until the fruit is soft, about 8 to 10 minutes
- Remove from the heat and cool
- In a food processor, fitted with a metal blade, puree the strawberries until smooth
- Turn into a mixing bowl, and when ready to serve add the remaining sliced strawberries
- Mix well

Saturday, March 8, 2008

German Black Forest Cake - the one I actually made!

It's finally done... it seems a little long in coming, since i changed so many things along the way. But I have completed this baking project and it's time to share. I have to say something about this... even though noone probably cares, i notice, and i care! This pictures aren't as exciting as I would have liked them to be. I had a time limit factor, transportation issues and the extreme fact that the sun didn't shine at all yesterday! So they are what they are, and while they are nice, they just aren't as nice as i would like. But here ya go...


Ingredients:

German Chocolate Cake
2 cup all-purpose flour
3/4 cup cocoa
3/4 tsp baking soda
2 cups sugar
1 1/2 tsp baking powder
3/4 tsp salt
1/2 cup shortening or butter
1 cup milk
3 eggs
1 tbsp vanilla extract
1 (21 oz) can cherry pie filling


Whipped Cream Frosting
24 oz heavy whipping cream
1/2 cup powdered sugar

Garnish
about 1/3 cup shaved chocolate
maraschino or fresh stemmed cherries


Preparation:

Cake
- Grease two 9 inch cake pans lined on bottom with waxed or parchment paper
- Combine dry ingredients in large mixing bowl; stir until well mixed
- Add shortening, eggs, milk and vanilla; beat mixture 3 minutes at low speed of electric mixer scraping bowl occasionally
- Pour batter into pans. Bake at 350 degrees F. for 30-35 minutes or until wooden pick inserted in center comes out clean
- Cool cake in pans 10 minutes. Remove from pans and cool completely
- Split cake layers in half horizontally to make 4 layers
- (optional) Make fine crumbs using 1 cake layer; set crumbs aside
- Cake can be made one day ahead of time if you want


Frosting and assembly
- Using a vegetable peeler, or whatever works best for you, shave the chocolate. I did this ahead of time while i was watching tv as it was probably the most time consuming part... I wonder if you can buy shaved chocolate somewhere??
- Beat whipping cream until foamy; gradually add powdered sugar, beating until soft peaks form. - Place 1 cake layer on cake platter; spread with 1 cup whipped cream and top with 3/4 cup cherry pie filling
- *TIP* to keep filling from leaking out the sides, you can take a ziploc bag and fill it with some of the whipped cream. Then cut a hole in the corner and pipe an edge around the cake. This creates a barrier for the filling and makes assembly a little simpler
- Repeat with second layer and then top with third cake layer
- Frost sides and top with whipped cream, reserving some for garnish
- (optional) Pat cake crumbs generously around sides of cake
- Using a gallon sized zip loc bag, attach a star shaped piping tip by cutting one of the corners off and screwing the tip on just like any other bag (I did this because I didn't have any more bags, and actually found that it worked just as well and costs quite a bit less!)
- You can decorate the top however you like, but I squeezed about 14 blobs onto the top and then placed a maraschino cherry in the center of each. This way the portions are already determined
- Chill before serving

Wednesday, March 5, 2008

Deconstructed Black Forest Cake - minus pics :(

Last week I posted what I hoped to be my next great baking adventure. Click here to see it if you haven't already. Unfortunately, I am not going to be making this particular recipe... but I plan to keep it in my archive for the next dinner party I get a chance to sweeten :) And I am also making a less exciting version of Black Forest cake on Friday, and i will for sure post pictures of that! But it would not be fair if I didn't post this other recipe at all, since it is indeed one of the coolest dessert ideas ever... at least i think so

So here are the directions, and at the end are my comments on what I would potentially change.


TREND: Deconstructed desserts (breaking down a dish into its essential components, then serving the parts as a whole)

WHAT: The elements of Black Forest Cake — chocolate cake and pudding, cherries, whipped cream, and kirsch — are reimagined as sensuous, separate bites and sips.

Servings: Makes 10 servings

Ingredients:

Chocolate Sour Cream Cake
1 cup (2 sticks) butter, room temperature
1 1/2 cups (packed) golden brown sugar
2 large eggs
6 tablespoons unsweetened cocoa powder
1 1/2 teaspoons baking soda
1 teaspoon vanilla extract
1/4 teaspoon salt
1 1/2 cups sifted cake flour
2/3 cup sour cream
3/4 cup hot coffee


Chocolate fudge pots
2 ounces bittersweet (not unsweetened) or semisweet chocolate, chopped
2 cups heavy whipping cream
Pinch of salt
3 large egg yolks
1/4 cup sugar


Cherry Compote
4 cups frozen (unthawed) pitted cherries (about 1 pound)
2/3 cup plus 1 teaspoon sugar
2/3 cup dry red wine


Other Miscellaneous Ingredients
Unsweetened cocoa powder
1 cup chilled whipping cream
Chilled kirsch (clear cherry brandy)

PreparationFor cake
- Preheat oven to 350°F
- Butter 14x10x1-inch rimmed baking sheet. Line sheet with parchment; butter paper
- Using electric mixer, beat butter in large bowl until smooth
- Add sugar and eggs; beat until light and fluffy, about 3 minutes
- Mix in next 4 ingredients
- Beat in flour alternately with sour cream in 2 additions each
- Gradually add hot coffee; mix until smooth (batter will be thin)
- Pour batter into prepared pan. Bake cake until toothpick inserted into center comes out with moist crumbs attached, about 25 minutes
- Cool cake in pan on rack
- Cover and chill until cold, about 4 hours (Can be made 1 day ahead)

For chocolate fudge pots
- Preheat oven to 325°F
- Place chocolate in bowl
- Bring cream and salt just to boil in medium saucepan
- Pour over chocolate; whisk until melted
- Whisk yolks and sugar in bowl to blend; whisk in hot chocolate mixture
- Transfer mixture to same saucepan. Cook over medium-low heat until slightly thickened, stirring constantly, about 5 minutes (do not boil)
- Divide chocolate custard among ten 1/3-cup ramekins (about 1/4 cup in each)
- Place ramekins in large roasting pan
- Add enough water to pan to come halfway up sides of ramekins. Cover pan tightly with foil.
- Bake until custards are almost set, about 37 minutes
- Remove ramekins from pan; cool 15 minutes. Chill uncovered until cold, about 3 hours. (Can be made 1 day ahead.)


For cherry compote
- Stir cherries and 2/3 cup sugar in large saucepan over medium heat 2 minutes
- Add wine; simmer until slightly reduced, about 4 minutes
- Drain cherries over medium bowl; return juices to saucepan and reserve cherries in same bowl
- Boil juices until reduced to 1/2 cup, about 8 minutes
- Pour over cherries; cool


Assembly
- Using 3-inch-diameter cookie cutter and dipping edges of cutter into cocoa powder, cut 10 rounds from cold cake
- Let cakes come to room temperature
- Using electric mixer, whip cream and 1 teaspoon sugar in bowl until peaks form
- Pour kirsch into 10 small glasses
- Place 1 cake, 1 chocolate fudge pot, spoonful of cherries, whipped cream, and glass of kirsch on each of 10 plates and serve


So here are my two cents... as i haven't actually made this, I can only offer opinions. I read that the cherries can be substituted for canned cherries, cherry pie filling, or if you're feeling healthy, then organic fresh cherries. Each variation would probably make a pretty significant difference, so it's pretty much up to you. The only other thing I read that really stood out was the use of the kirsch. I have never actually tried the stuff... but i've heard that it's like fire water. There were reviews on this recipe where people had used the kirsch, and others where they did not. Both had good things to say. I think honestly that it's a matter of taste... it could possibly balance out the sweetness of everything else... but i suspect that you could substitute something else... just not sure what :)

Anyways, if YOU make this recipe, I want to see it!

Thursday, February 28, 2008

solutions

I found a solution to my boredom. I decided that I needed a project... so i went and found one!

Of course there is the ever-constant, never-ending scrapbooking project... and how i had forgotten about this is beyond me. But my mom bought me a TON of vellum and quotes last night, which i am a huge fan of... so tomorrow will be scrapbooking day. YAY!

Buuuuuuut... that's not actually the real project I came up with. Ramon's bday party is next friday and melissa have been trying to come up with a cake for the occasion. he described what he wanted and it came pretty close to a black forest cherry cake. I have never made one of these, so I am very excited about it.

I found this fabulous recipe for a "deconstructed" black forest cake. it is the coolest idea ever. You make all the components of the recipe separately, and then serve it all together but still separate... like this:


It took me a minute to figure this out, but once i did, i couldn't get over how cool it is. So next week, this is what I will be doing :)

Recipe and photos to come!

Tuesday, February 26, 2008

Wordless Wednesday with a Twist - part 1

A week or so ago I posted about the FotoFest that Rachel is hosting over at americanmum. So here is my entry, but i'm sure that there will be many more. If you like what you see here, go on over to Rachel's blog and click on some of the other entries. Enjoy :)

"Pancakes"


Wednesday, February 13, 2008

V Day Cookies

I felt an uncontrollable urge to take some cool pictures last night, and since Melissa was going to bake cookies today and had invited me over to help it was the perfect opportunity!


This past weekend my small group from church did an outreach where we decorated Valentine's Day cookies together and then delivered them to different people in the church. Mostly elderly single or widowed people, but a few others who we thought could use a little cheer this time of year.


The recipe that Melissa used was a basic sugar cookie mix. In fact, I believe that it was actually a mix that you can buy and then add maybe butter and an egg or something. Whatever it was they were great! At any rate, I went on a little icing adventure with Alicia this weekend in the midst of our great cookie baking experience. We mixed up more icing that i've ever seen and or used in my whole life. So I broke the icing down into a *manageable* amount and wrote it down here for you.


It's kind of a combination of the icing that my family uses for Christmas cookies and basic buttercream frosting.

1 bag confectioners sugar
3/4 cup butter
milk to desirable consistency
1 tsp flavoring of choice

The milk is variable, since i never actually measured that. Or the flavoring for that matter! So basically you would put the butter in the microwave for a few seconds to soften it up. Then add the confec sugar and mix it up with a mixer adding milk slowly to make it mixable. Depending on how thin/thick you want the icing will determine how much of the milk you actually use. And if you add too much milk and it's too runny, you could always add some more sugar... that is if you have any left!


The flavoring is my favorite part, because that's what gives cookies a true "signature" taste. I made some cookies later on this afternoon as well for my cadre tomorrow and used almond flavoring in both the mix and the frosting. They are sooo yummy!

The super amazing cookie decorating experience

While we were at Melissa's today baking cookies, A decided that he wanted to decorate them. I was envisioning a complete mess... however, i was not going to let that stop his creativity from flowing forth. Sometimes you just have to clean up a little... and there's nothing wrong with that!

So when i told him he could decorate some for his sisters and his mommy and daddy this is the face I saw.


And wouldn't ya know, the kid actually produced awe worthy art! Not just the kind that you say is so beautiful because he made such an effort to produce something wonderful, this was actual bona fide, pretty darn good decorating!


And I am very proud to say that I literally did not help him with any of it, except for the one that has writing on it :)

Saturday, January 26, 2008

Happy 50th to Me!


In case you didn't figure out what the 50 is for, it's for my 50th post! And since this particular cake is one that i have actually looked at before hoping that someday i can be good enough at cake making and decorating AND it has the number 50 on it, i thought it would be completely appropriate. I actually think that it looks pretty doable. Except for the base icing that is so perfectly smooth. there has to be an explainable trick! but the other stuff i know how to do.

The only problem with this cake is that i can't eat it :( nor would i want to!

Tuesday, January 22, 2008

Chocolate Chocolate Cake

This is it, i swear... i won't post anymore about cake... at least til next time :)


This will probably be the longest blog i've ever posted, but i think it's worth it. I decided to try my hand at cake baking as you can see in my previous posts. It turned out really well and I wanted to share it with anyone who reads this blog. I found the original recipe from another blog and since copying is the sincerest form of flattery I am not ashamed to admit that my ideas were truly inspired and not thought up on my own :) Plus, I had some amazing help from melissa. Together we make up 66% of a brain... we haven't quite figured out where the other 33% went...


I made a few of my own changes, only out of necessity... aka messing up and not being able to find certain things *smile* But I was really happy with the way it turned out. The cake was delicious. It had a very dark chocolatey taste and as I was enjoying some with alicia yesterday, we were discussing how we don't necessarily ever CRAVE chocolate... but once we start in on it, it's just sooo good. This cake did it for me!


Chocolate Lovers' Chocolate Cake

1 3/4 cups all-purpose flour, plus more for dusting
2 cups sugar
3/4 cup unsweetened cocoa powder
2 teaspoons baking soda
1 teaspoon baking powder
1 teaspoon salt
1 cup buttermilk
1/2 cup vegetable oil
2 large eggs
1 teaspoon pure vanilla extract
1 cup freshly brewed hot coffee


Filling: Whipped Dark Chocolate Ganache (enough to fill one layer)
1 cup heavy cream
3 ounces 72% dark chocolate (about 7 squares)
2 teaspoons granulated sugar


For the ganache: (used as topping)
2/3 cup (3 oz) heavy cream
4 ounces best-quality bittersweet/dark chocolate


Decoration:
Chocolate Raspberry Milano Cookies
Raspberries
Easy white frosting
- 1/2 cup shortening
- 1/2 tsp vanilla
- 4 3/4 c powdered sugar
- 3 to 4 Tbsp milk, divided
- Beat shortening and vanilla at medium speed for 30 seconds.
- Gradually add about half of the powdered sugar, beating well.
- Add 2 Tbsp of milk.
- Gradually beat in the remaining powdered sugar and enough milk to make the frosting of spreading consistency.


Make the cake:

- Preheat the oven to 350°.
- Butter two 9-inch round cake pans and line them with parchment paper; butter the paper.
- Dust the pans with flour, tapping out any excess.
- In a medium sized bowl, mix the flour with the sugar, cocoa powder, baking soda, baking powder and salt at low speed.
- In a separate bowl, whisk the buttermilk with the oil, eggs and vanilla.
- Slowly beat the buttermilk mixture into the dry ingredients until just incorporated, then slowly beat in the hot coffee until fully incorporated.
- Pour the batter into the prepared pans. I didn't get an exact time for this because I tend to go by instinct rather than the timer. But as a guideline, I would say leave them in the oven for about 15 minutes and then check them every 4 to 5 minutes after that. It shouldn't take longer than 25 minutes I would suppose.
- When the center no longer looks liquid, insert a toothpick in the center of each cake and if it comes out clean, they are done.
- Let the cakes cool in the pans for 30 minutes, then invert the cakes onto a rack to cool completely.
- Peel off the parchment paper.
- After the cakes are completely cooled, use a cake leveler to make all 3 cakes the same thickness.


Make the whipped gananche (filling):

- Break the chocolate into pieces and place in a small *metal* bowl.
- Prepare some HOT water in another larger bowl.
- Heat the heavy cream and sugar in a small saucepan until it bubbles on the edges and immediately pour it over the chocolate.
- After you pour the cream onto the chocolate, place the smaller bowl into the larger bowl.
- This allows the heat from the cream to melt the chocolate and the hot water will keep the heat in so that the chocolate can melt completely.
- Stir slowly after a minute or two to make sure all the chocolate is getting melted.
- Let stand for 10-15 minutes.
- Slowly stir to make sure that the chocolate has completely melted.
- Cover bowl with foil and chill at least 6 hours or overnight.
- When ready to use the ganache, use an electric mixer to whip it until it is a fluffy but thick consistency. It only take a minute or so with the mixer before it is ready.


Make the gananche (icing):
(do this after you have already assembled the three layers with the whipped ganache)

- Bring 2/3 cup of heavy cream to a near boil in a small saucepan.
- When it is steaming well, remove it from heat and pour over the chopped chocolate.
- Stir or whisk until the chocolate is completely melted.
- The mixture should be smooth and should spread over the cake easily.


Assemble the cake:

- Spread some icing on the cake plate to keep the cake from moving around
- Set a cake layer on the plate with its flat side facing up.
- Evenly spread the whipped ganache over the cake. Top with the second cake layer, and repeat with the third.
- Once the cake is assembled, use the dark chocolate ganache icing to spread evenly on the top and the sides of the cake.
- Immediately place the Milano Cookies around the outside.
- Then you can use your imagination with the top. I used the easy white frosting and squeezed it out of an icing bag into a blob in the center and topped with some raspberries.


- Refrigerate at least 1 hour before serving.

Sunday, January 20, 2008

more cake... and other yummy food too

I really like photographing food. even if i didn't make it. in fact, i really am finding that it is an itch that i must start scratching. I love to see beautiful pictures of food, no matter who took them. So i thought I would share these that I took today at Beka's shower.


Related Posts Plugin for WordPress, Blogger...

  © Blogger template 'Isolation' by Ourblogtemplates.com 2008      ©Layout Designed ' by Indelible Creations 2009

Back to TOP